Make Roblox fight Shorts with Claude (free skill)
By the end
Your own idea, typed in one line, turned into a finished vertical Roblox-style Short (1080x1920, with sound and captions) that you can post on your channel.
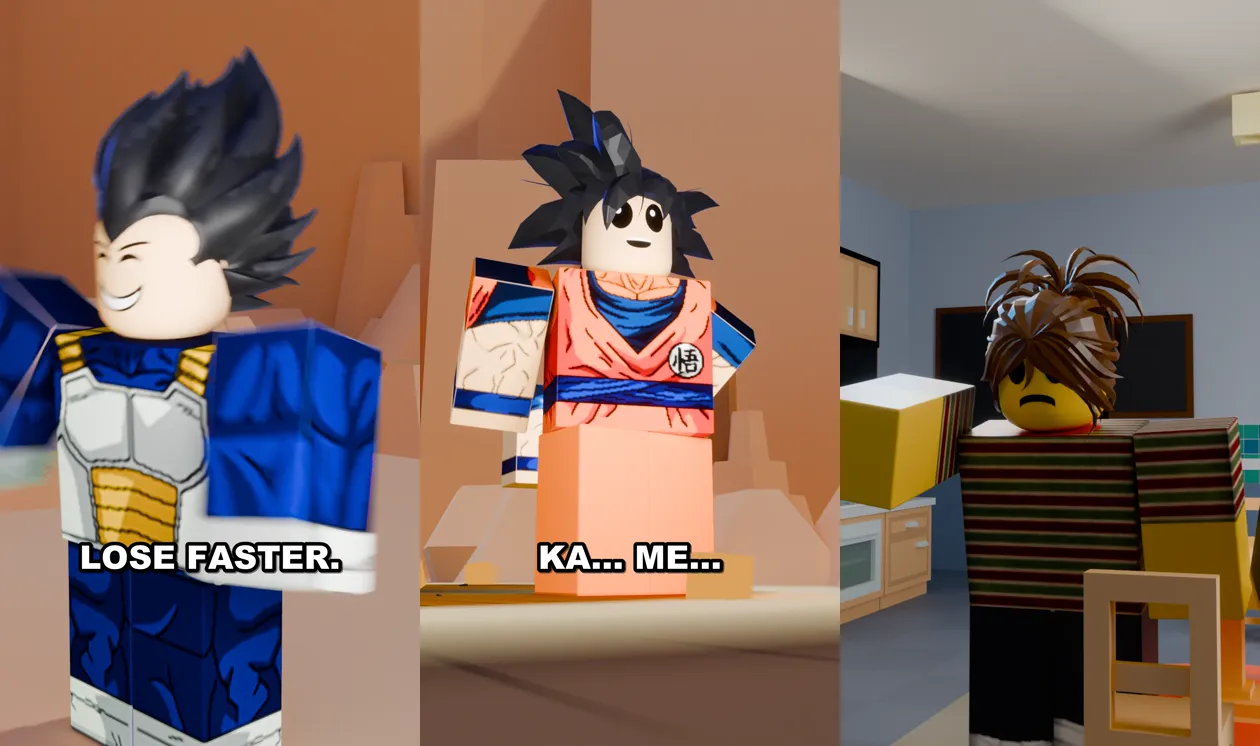
Claude writes the story, the engine animates every character in Blender, checks every scene for mistakes, then renders it with sound. You never touch a keyframe. The engine, the sounds, Blender and Roblox Studio are free: the only thing you pay for is your Claude plan.
This fight is a few seconds of my Short. Claude animated every punch, the dust and the camera:
What you need
- Claude Code with a Claude plan (Pro is enough, see the questions at the end)
- Blender 5.2 (free)
- Roblox Studio and a Roblox account (free)
- Python 3.10 or newer and ffmpeg
- A PC with a graphics card (I use a laptop with an RTX 3080 Ti)
- ElevenLabs for the real character voices (affiliate link)
- Blotato to post your Shorts straight from Claude (affiliate link)
Set up your PC
0 of 12 done
Step 1
Install Blender, Python and ffmpeg
Install Blender 5.2 in its default folder. Install Python and tick Add python.exe to PATH in the installer. For ffmpeg, the easiest way on Windows is to open a terminal and type:
Prompt to copywinget install ffmpeg
Then install the two Python packages the engine needs:
Prompt to copypip install numpy pillow
It works if typing
ffmpeg -versionandpython --versionin a new terminal both answer with a version number.Step 2
Install the skill in Claude Code
Open Claude Code in an empty folder for your Shorts (for example
D:\roblox-shorts). The skill is free on GitHub. Paste these two lines, one at a time, and press Enter after each:Prompt to copy/plugin marketplace add nocodehack/nocodehack-roblox-engine
Prompt to copy/plugin install nocodehack@nocodehack-roblox-engine
Then restart Claude Code.
No plugin menu? On the GitHub page click Code, then Download ZIP, unzip it, and copy the folder
skills/roblox-engineintoC:\Users\<you>\.claude\skills\. Restart Claude Code.Step 3
Let Claude check your machine
Type this in Claude Code:
Prompt to copyuse the nocodehack skill to check my machine
The first time, Claude copies the engine into a
nocodehack-enginefolder inside your project and runs its check. It looks for Blender, ffmpeg, Python, the two packages and your graphics card. If something is missing, Claude tells you exactly what to download.It works if Blender, ffmpeg, Python and the packages all say
OK. The hair, animations and sets come from your Roblox Studio in the next chapter, so they can sayMISSINGfor now.
Connect Roblox Studio
Step 4
Turn on the Studio connection
The engine needs this: your characters' hair, animations and sets come from your own Roblox Studio. It's also my favourite trick. Roblox refuses to send hair and clothes to a program that is not logged in (error 401). Your own Roblox Studio is already logged in, so Claude asks Studio for the item instead, and you never type a password.
- Open Roblox Studio, log in, and open any place (a Baseplate is fine).
- In Studio, open the Assistant, click the ... menu, choose Manage MCP Servers, and turn on Enable Studio as MCP server.
- Back in a terminal (not inside Claude Code), paste:
Prompt to copyclaude mcp add Roblox_Studio -- cmd.exe /c "cd /d %LOCALAPPDATA%\Roblox && .\mcp.bat"
Restart Claude Code and type
/mcp.It works if
/mcpshows Roblox_Studio as connected while Studio is open.Step 5
Fill the libraries from your Studio
Keep Studio open and type:
Prompt to copyuse the nocodehack skill to fill the libraries from my Roblox Studio
The first run takes about 20 minutes, and you only do it once. Claude loads the hair, the animations and the sets in your Studio, exports each 3D mesh and turns it the right way for Blender. The faces and clothes download by themselves. Later, when a story asks for something that isn't there, just say it, like
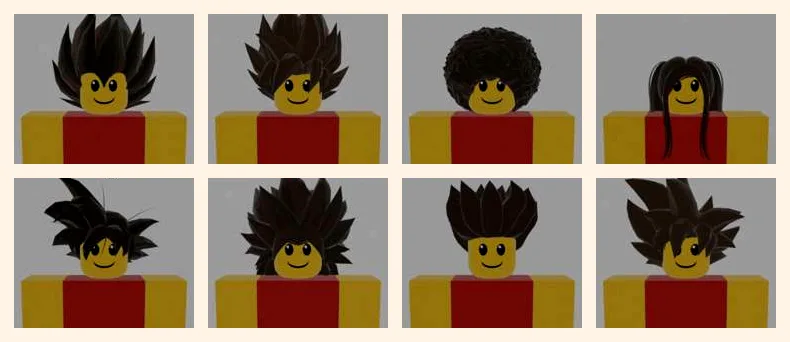
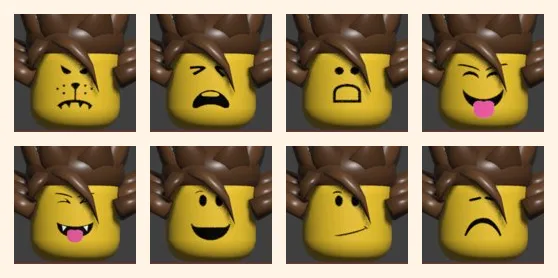
give Yamcha a short hair, and Claude fetches it the same way.This is what my libraries hold today: 49 hairstyles, 109 outfits and 132 faces, each face tagged with an emotion. A few of them:
It works if you run the machine check from step 3 again and the last line says
READY.
Make your first Short
Step 6
Type your first idea
One line is enough. Type your own idea, or copy mine:
Prompt to copyuse the nocodehack skill to make a Short where a kid tries to hide a bad grade from his mom
No idea yet? Use one of the formats the big Roblox channels use: the "what if" story, the "in this world" story, the POV, rich versus poor, a day in the life, or the twist at the end.
Prompt to copyuse the nocodehack skill to make a "what if" Short about a dragon in school
Claude writes one file,
stories/<name>/story.json, and checks it before anything is built.Step 7
Read and change the story file
Open
story.json. This is where you take control:- cast at the top: each character with hair, outfit and face.
- scenes below: where we are, and if it's day or night.
- beats and shots inside each scene: who moves, what they say, and where the camera looks, one line each.
You can change it by hand, or just ask Claude:
Prompt to copygive the kid Goku's hair and outfit
Claude finds them in the library and swaps them.
The moves come from a library of 47 poses and 24 animations, so a beat like
"pose": "arms_crossed"is all it takes. Some of them: cheer, point, shock, facepalm, wave, hands up, arms crossed, cower.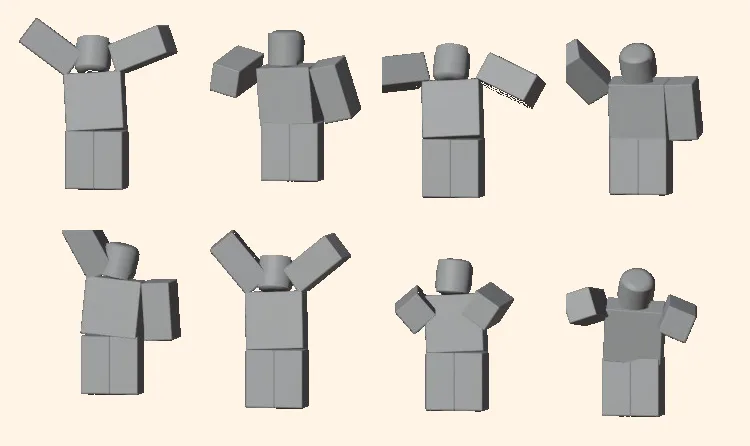
Step 8
Check the draft and the report
Before the real render, Claude makes a quick draft. It looks flat on purpose: it's only there to check the acting and the camera. Every scene also gets a report line like this one:
Prompt to copyREPORT PASS | hits 0 worst 0.0cm | slide 0.5cm | cuts OK
- PASS means the scene got through every check.
- hits counts the times two bodies go through each other.
- slide is how much the feet slip on the floor.
- cuts checks that the camera never jumps in a bad way.
If a scene says FAIL, you don't touch it. Claude reads the report, fixes the story and makes a new draft by itself.
It works if every scene says
REPORT PASSand the draft looks right to you.Step 9
Give your characters real voices
Out of the box, the characters talk in little game sounds. Real voices make the Short. I use ElevenLabs with Voice Design: you describe a voice in words, and it builds that voice for you.
- Open ElevenLabs and sign up.
- Click Voices, then Create a voice, then Voice Design.
- Describe one voice per character, listen to the 3 previews, and save the one you like with the character's name. For example:
Prompt to copyA proud teenage boy with a sharp, arrogant voice, fast and loud, like an anime rival who never admits he lost.
- Click your profile, then API keys, then Create API key. Copy it.
Then give it to Claude in one message:
Prompt to copyuse the nocodehack skill to give the characters real voices with ElevenLabs. My API key is <your key>, save it in a private .env file and never show it again. Use my saved voices: Kid = <voice name>, Mom = <voice name>. Use the newest ElevenLabs model and time every line to the mouth.
It works if the draft plays with your voices instead of the game sounds.
Step 10
Render it
When the draft looks right, say:
Prompt to copylooks good, render it at medium quality
- Low (
preview): about 1 hour for a 1-minute Short on a laptop like mine. - Medium (
mid): about 2 to 2.5 hours. This is the one I post. - High: on big graphics cards in the Google cloud, about 45 minutes, paid with Google's free credits. That has its own guide: Render Shorts in HQ on Google Cloud with free credits.
Low and medium render at half size, then the engine upscales to full HD. Rendering never uses your Claude plan, so press go and come back to a finished Short. Then Claude adds the sound: your voices, a hit sound on the right frame, music and the captions.
It works if you get a vertical mp4 with sound in
stories/<name>/.- Low (
Change it and post it
Step 11
Change it with one sentence
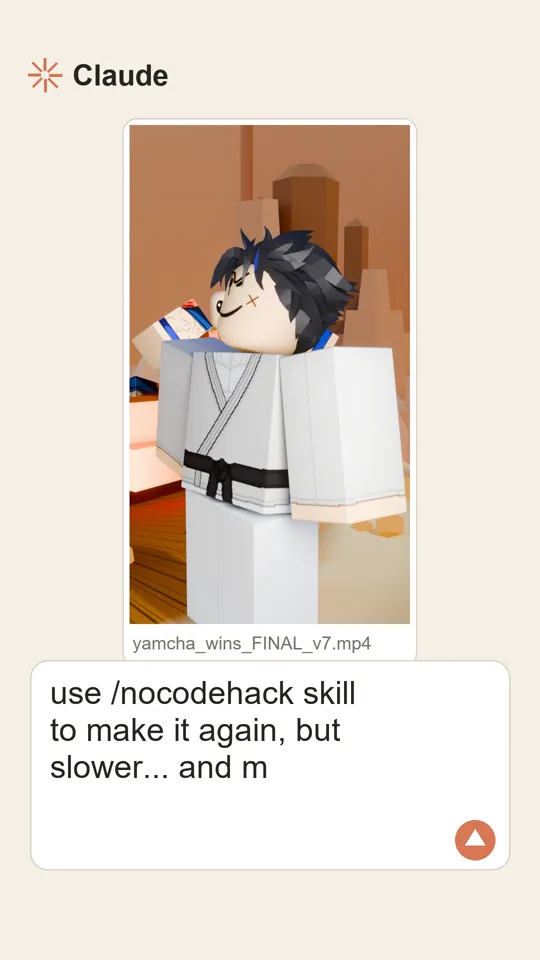
Want a change? Don't open anything. Just type it:
 Prompt to copy
use the nocodehack skill to make it again, but slower, and make Vegeta cry a little
Claude edits the story, runs the checks again and makes a new draft.
Step 12
Post it without opening YouTube
The last step is posting, and you don't even need to open YouTube for it. I use Blotato, which plugs straight into Claude Code.
- Sign up on Blotato and connect your YouTube channel (TikTok and Instagram work too).
- In Blotato, open Settings, then API, and copy your API key.
- Give it to Claude:
Prompt to copyconnect Blotato to Claude Code with my API key <your key>, keep the key private, and list my connected accounts
Then I just tell Claude:
Prompt to copypost this Short to my YouTube as private, and show me what you'll send first
When it looks right, type
go, and it uploads.
The three questions everyone asks
Does it work on the Claude Pro plan? Yes, I measured it. Claude only writes the story and fixes it until every scene passes. Even a complex 1-minute fight took about 9 minutes of Claude work, about 1 % of a Pro 5-hour session. Teaching the engine something new (a new move, a new effect) is real coding and costs much more, but after that every Short is back to about 1 %.
Can my PC render it? Yes, if it has a graphics card. Low quality is about 1 hour for a 1-minute Short, medium about 2 to 2.5 hours. Without an NVIDIA card it still works, just slower.
How many Shorts can I make in a day? On one laptop, your graphics card is the limit, not your Claude plan: in 5 hours, about 4 Shorts at low quality or 2 at medium.
What it can't do yet: real lip sync (the mouth opens and closes) and bending elbows (the arms stay straight, like in Roblox itself).
Can I make money with it? Yes. The engine is free (Apache 2.0). The Shorts you make are 100 % yours, no credit needed.